Building a gaming Arcade
Wood planks + wires turned into a fully functional arcade machine.
There’s something magical about standing in front of a real arcade cabinet — joystick in hand, buttons ready, music blasting, and a screen filled with pixelated nostalgia. We wanted that magic so we built our very own upright arcade machine from scratch.
Armed with plywood, MDF, a controller kit from The Geek Pub, and a Raspberry Pi running RetroPie, we went all-in. This post is a walkthrough of how we did it, with photos from every step of the journey.
What we used
Electronics & Software
- Raspberry Pi 3 (with RetroPie installed)
- 2x Arcade joysticks + 16x arcade buttons (from Geek Pub controller kit)
- USB encoder boards for wiring joysticks/buttons to Pi
- Logitech desktop speakers (mounted in marquee)
- LCD monitor (salvaged from an old screen)
- Power strip inside the cabinet
- Retropie (emulation software + ROM management)
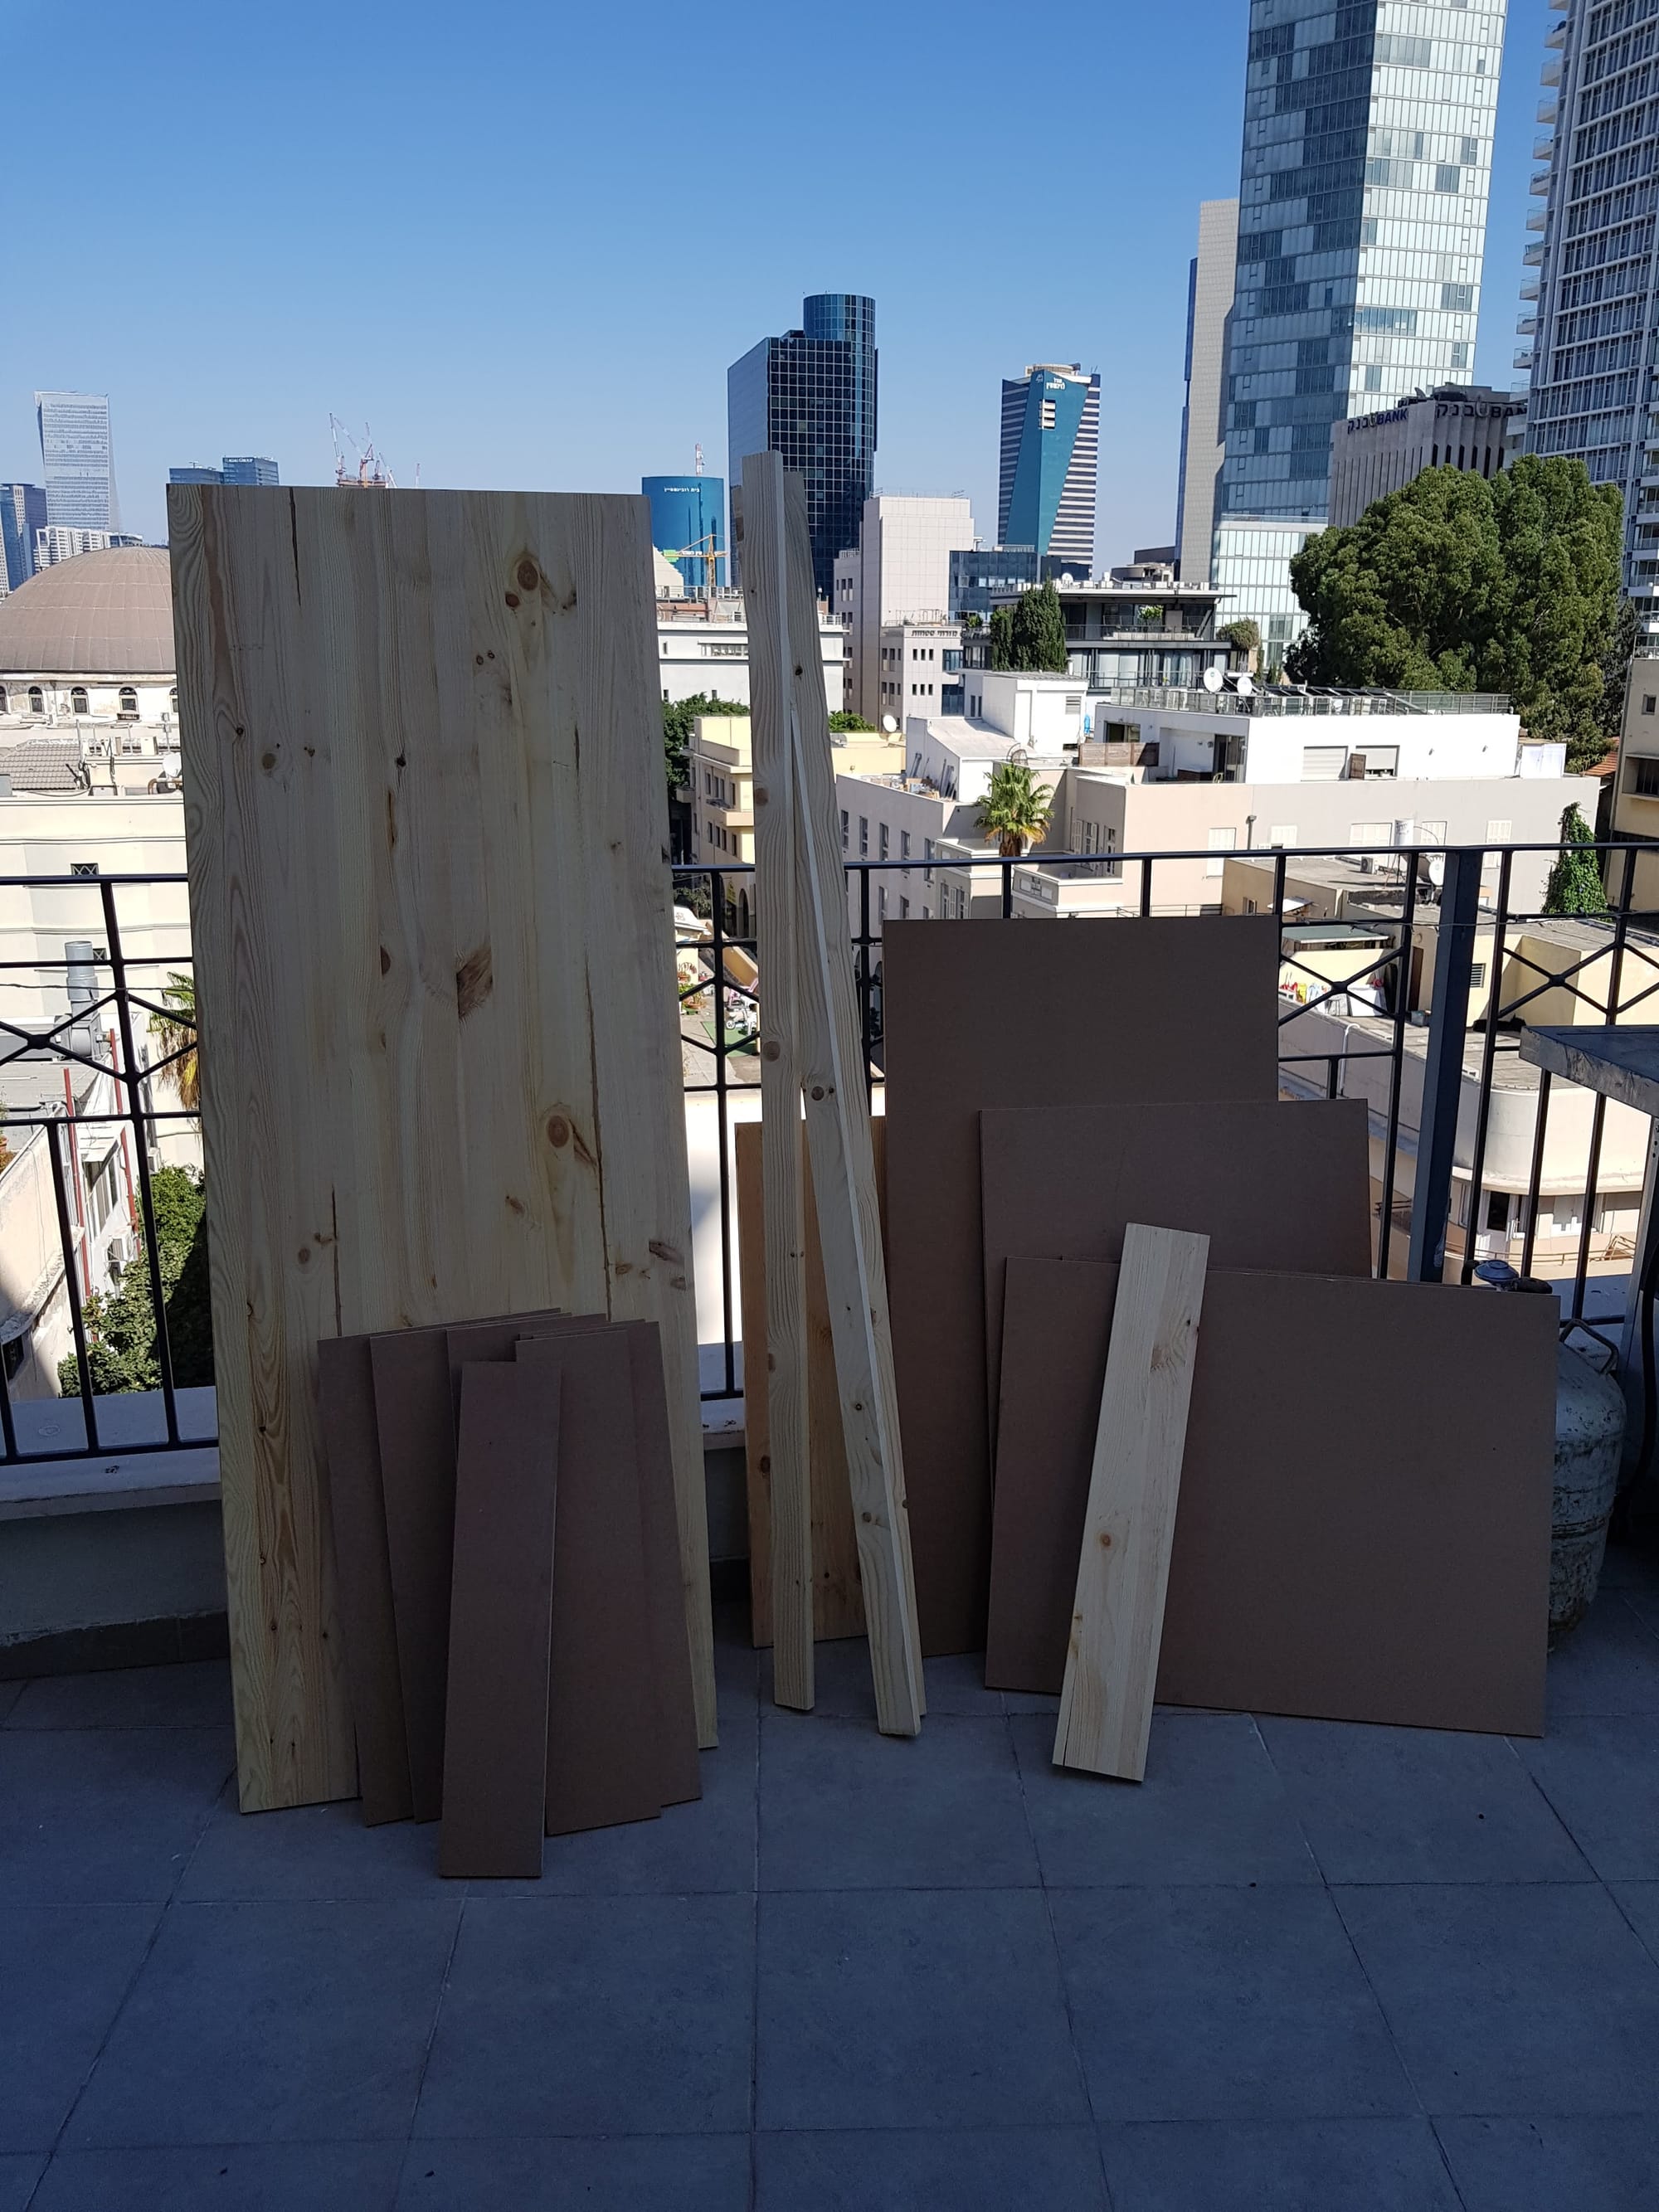
Wood & Build Materials
- MDF boards for front, control panel, shelves, back panel
- Solid pine boards for the sides (stronger and prettier than plain MDF)
- Screws, wood glue, corner brackets
- Hinges for back door access
- Plexiglass for monitor bezel and marquee
- Paint or melamine finish (optional, we kept a natural wood vibe)
Tools
- Drill & drill bits (spade bit for button holes)
- Jigsaw
- Router (optional, for rounded edges)
- Screwdrivers
- Sandpaper & clamps
Step 1: Designing & Cutting the Cabinet
We started with the Easy-Cab arcade plans, but adjusted dimensions to fit our screen and space.
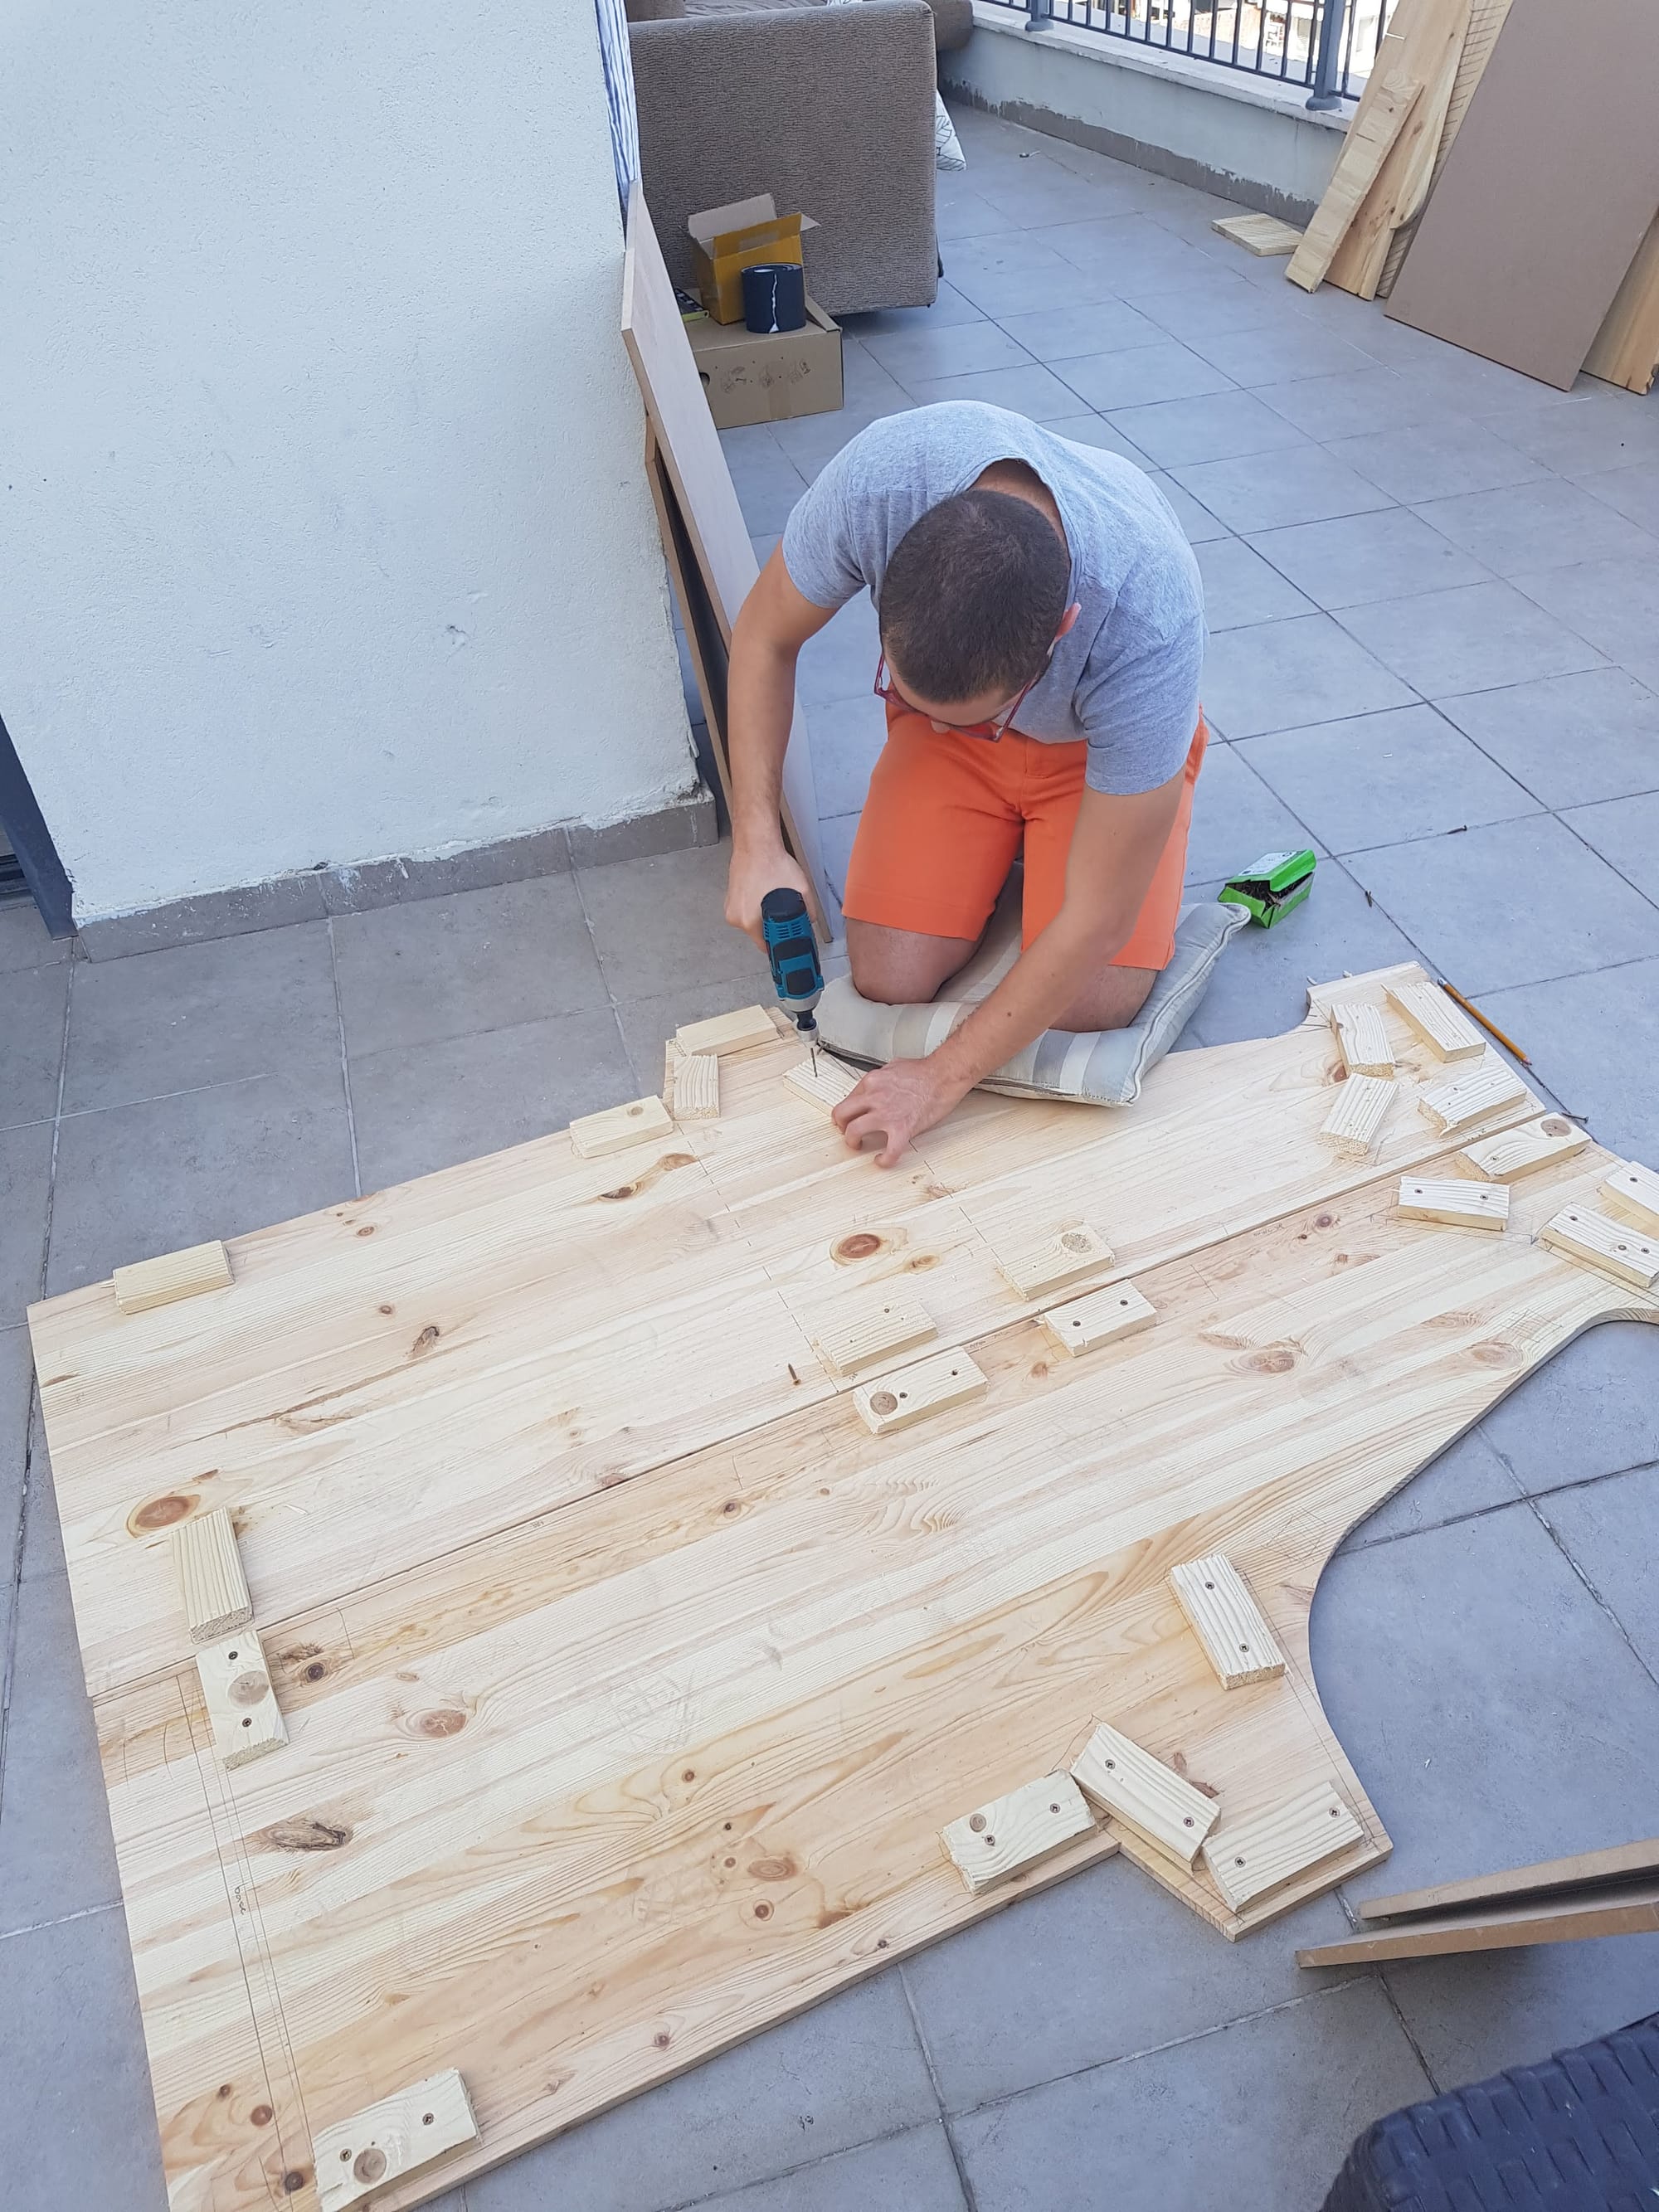
The key trick: cut one side panel, then trace it to make the second identical. For the inner shelves and control panel, we used MDF to save weight.
Step 2: Assembly
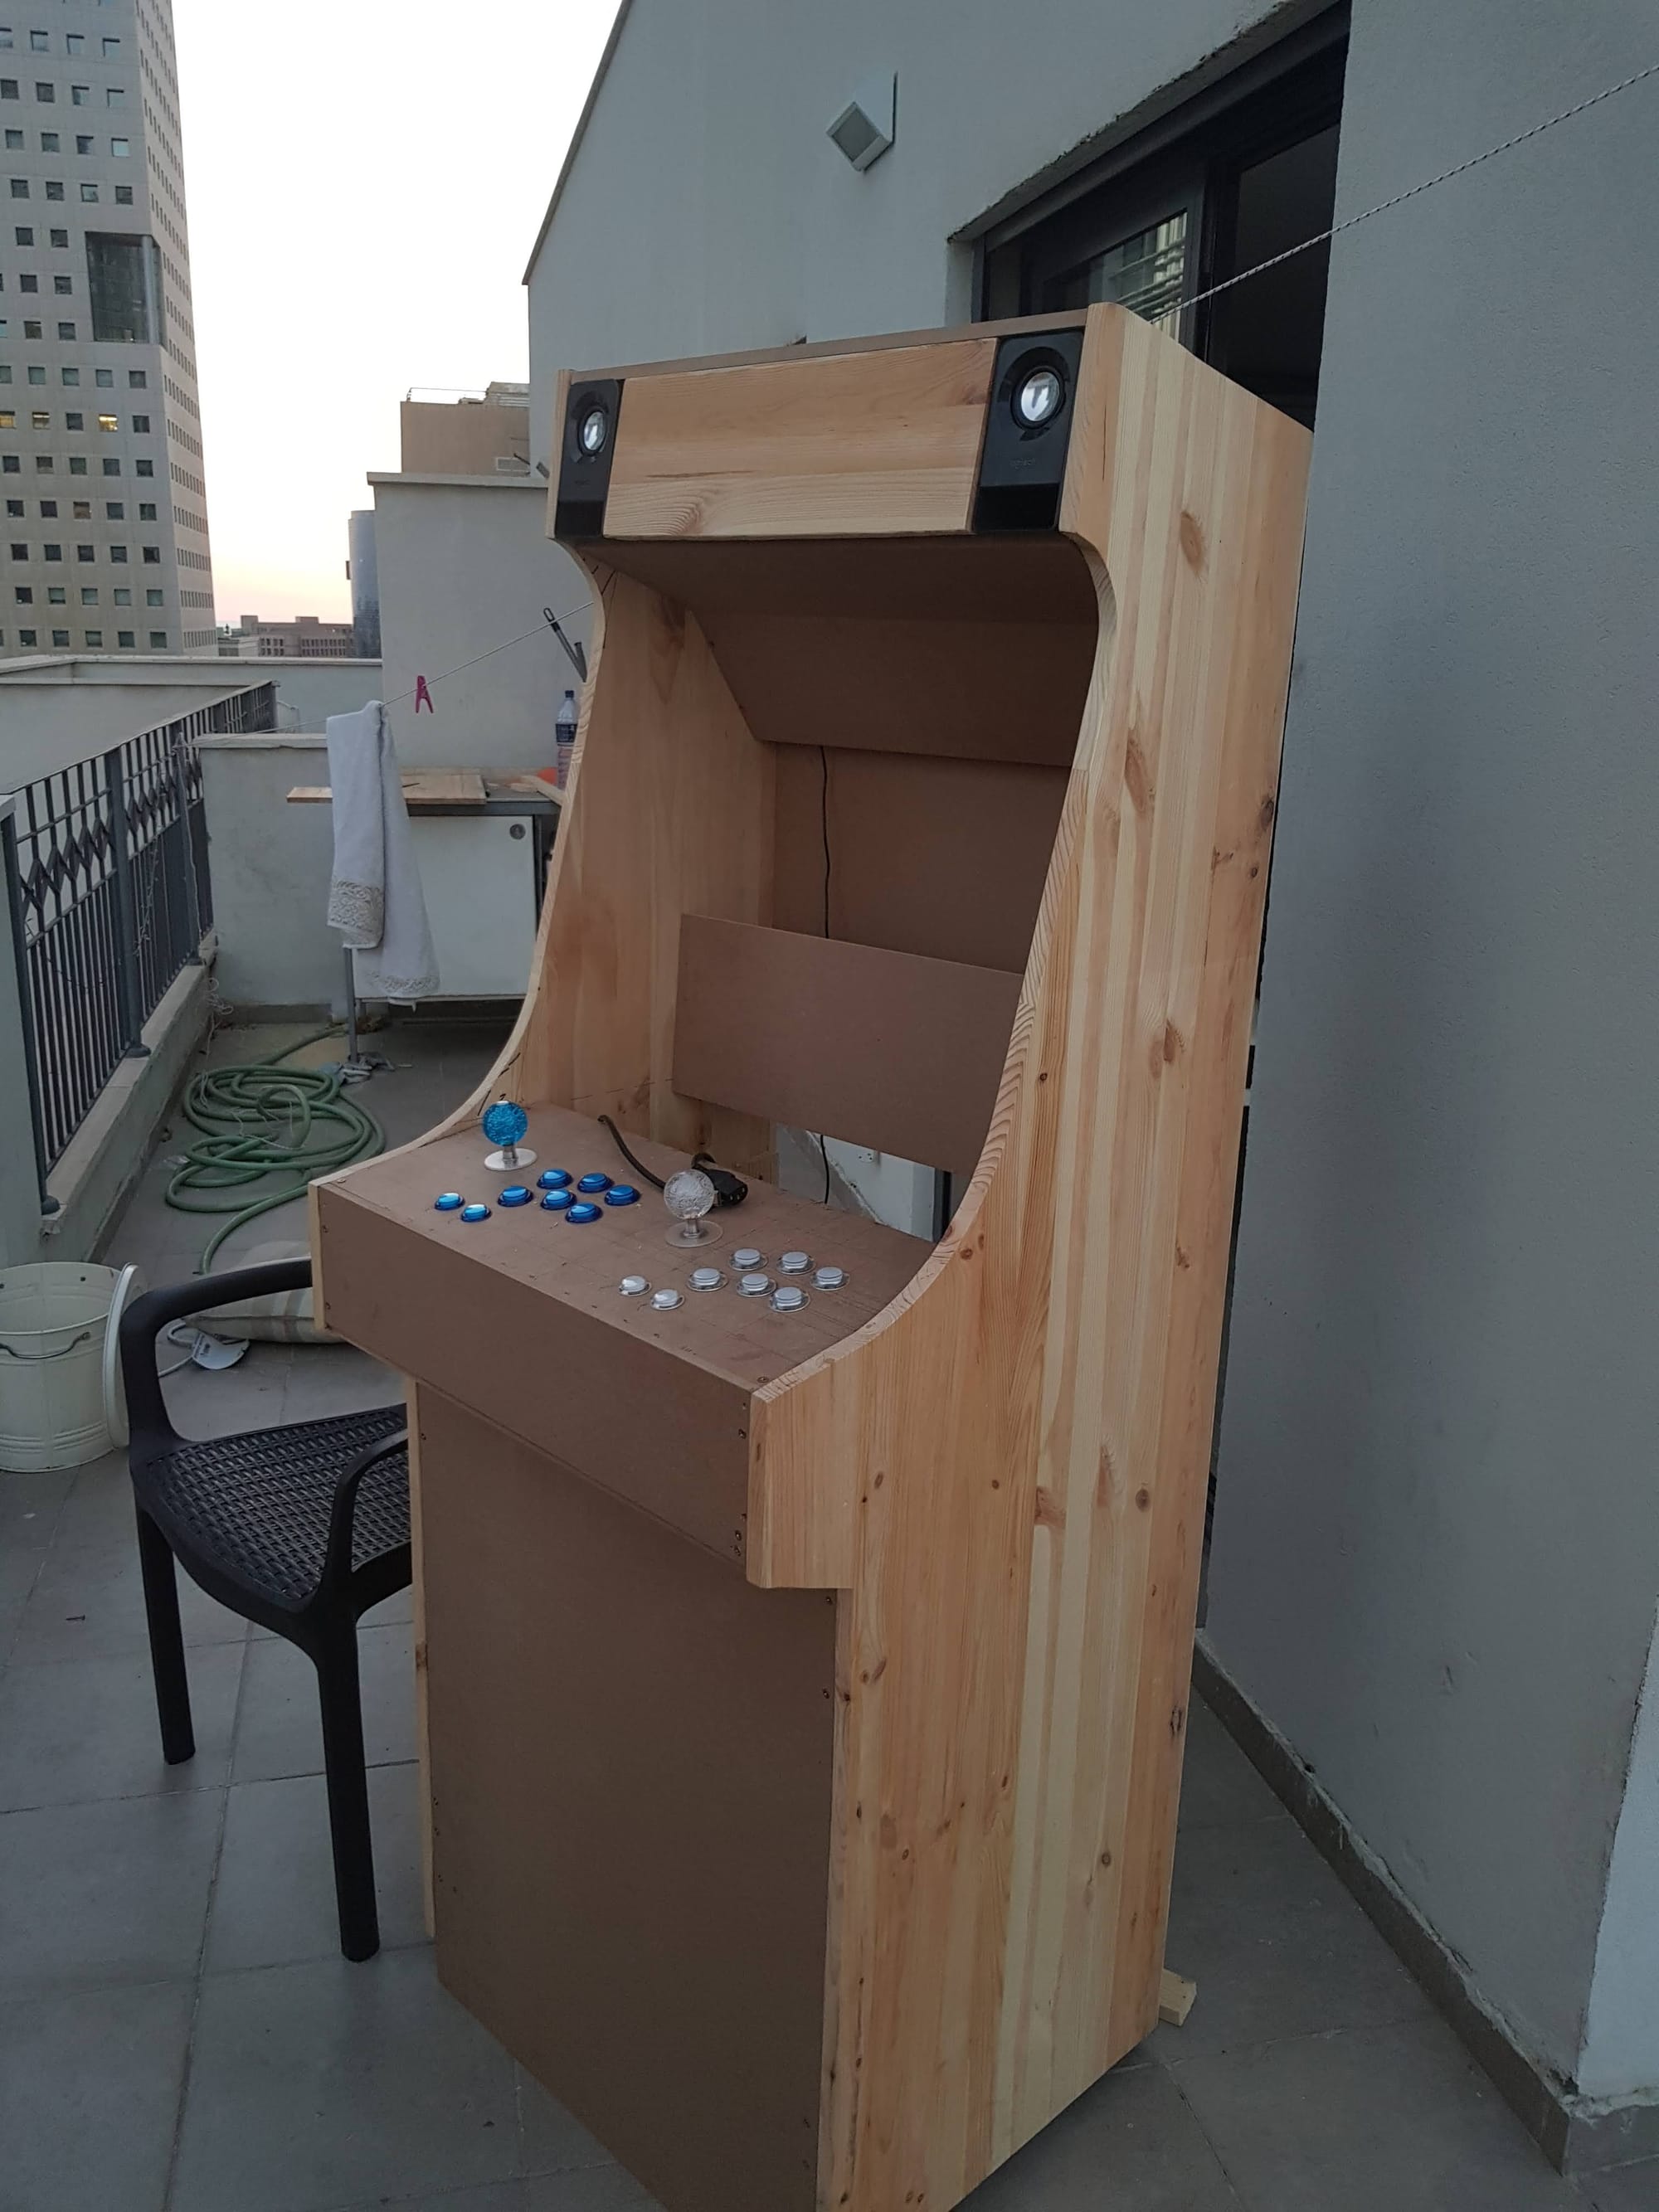
We added wooden blocks/braces inside to screw panels together solidly. Slowly, it began to take shape.
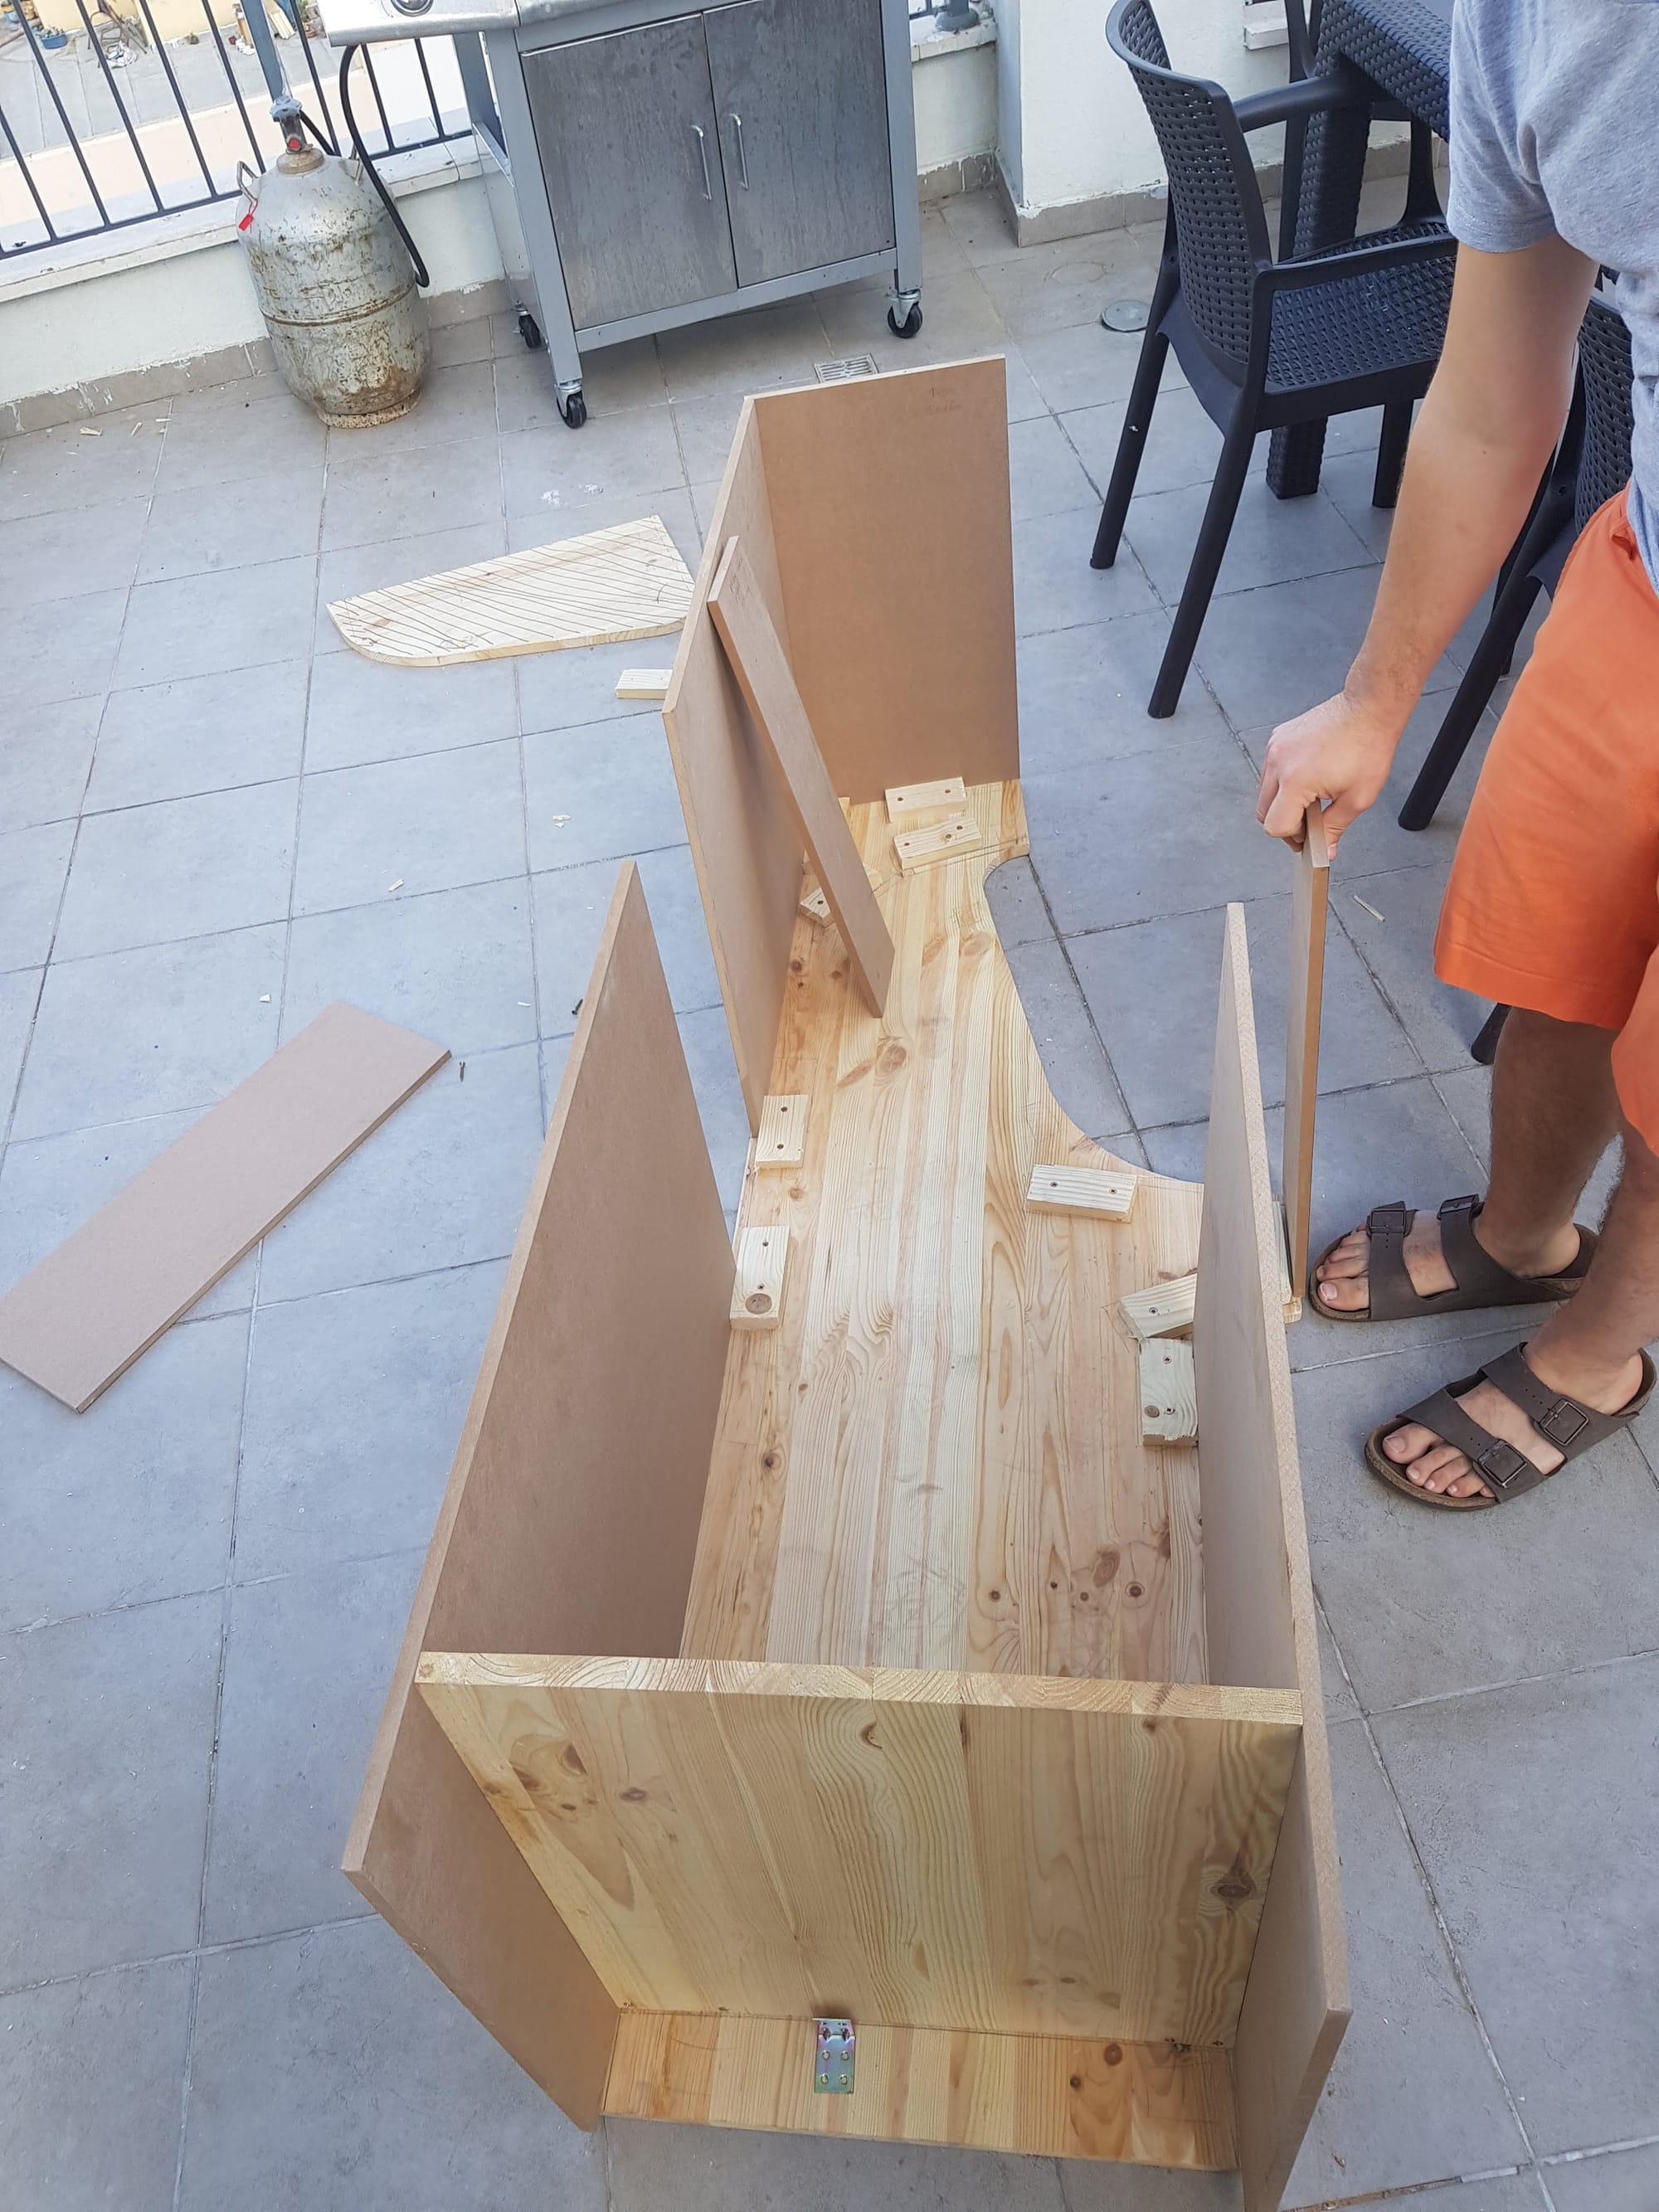
Already looked like a real arcade!
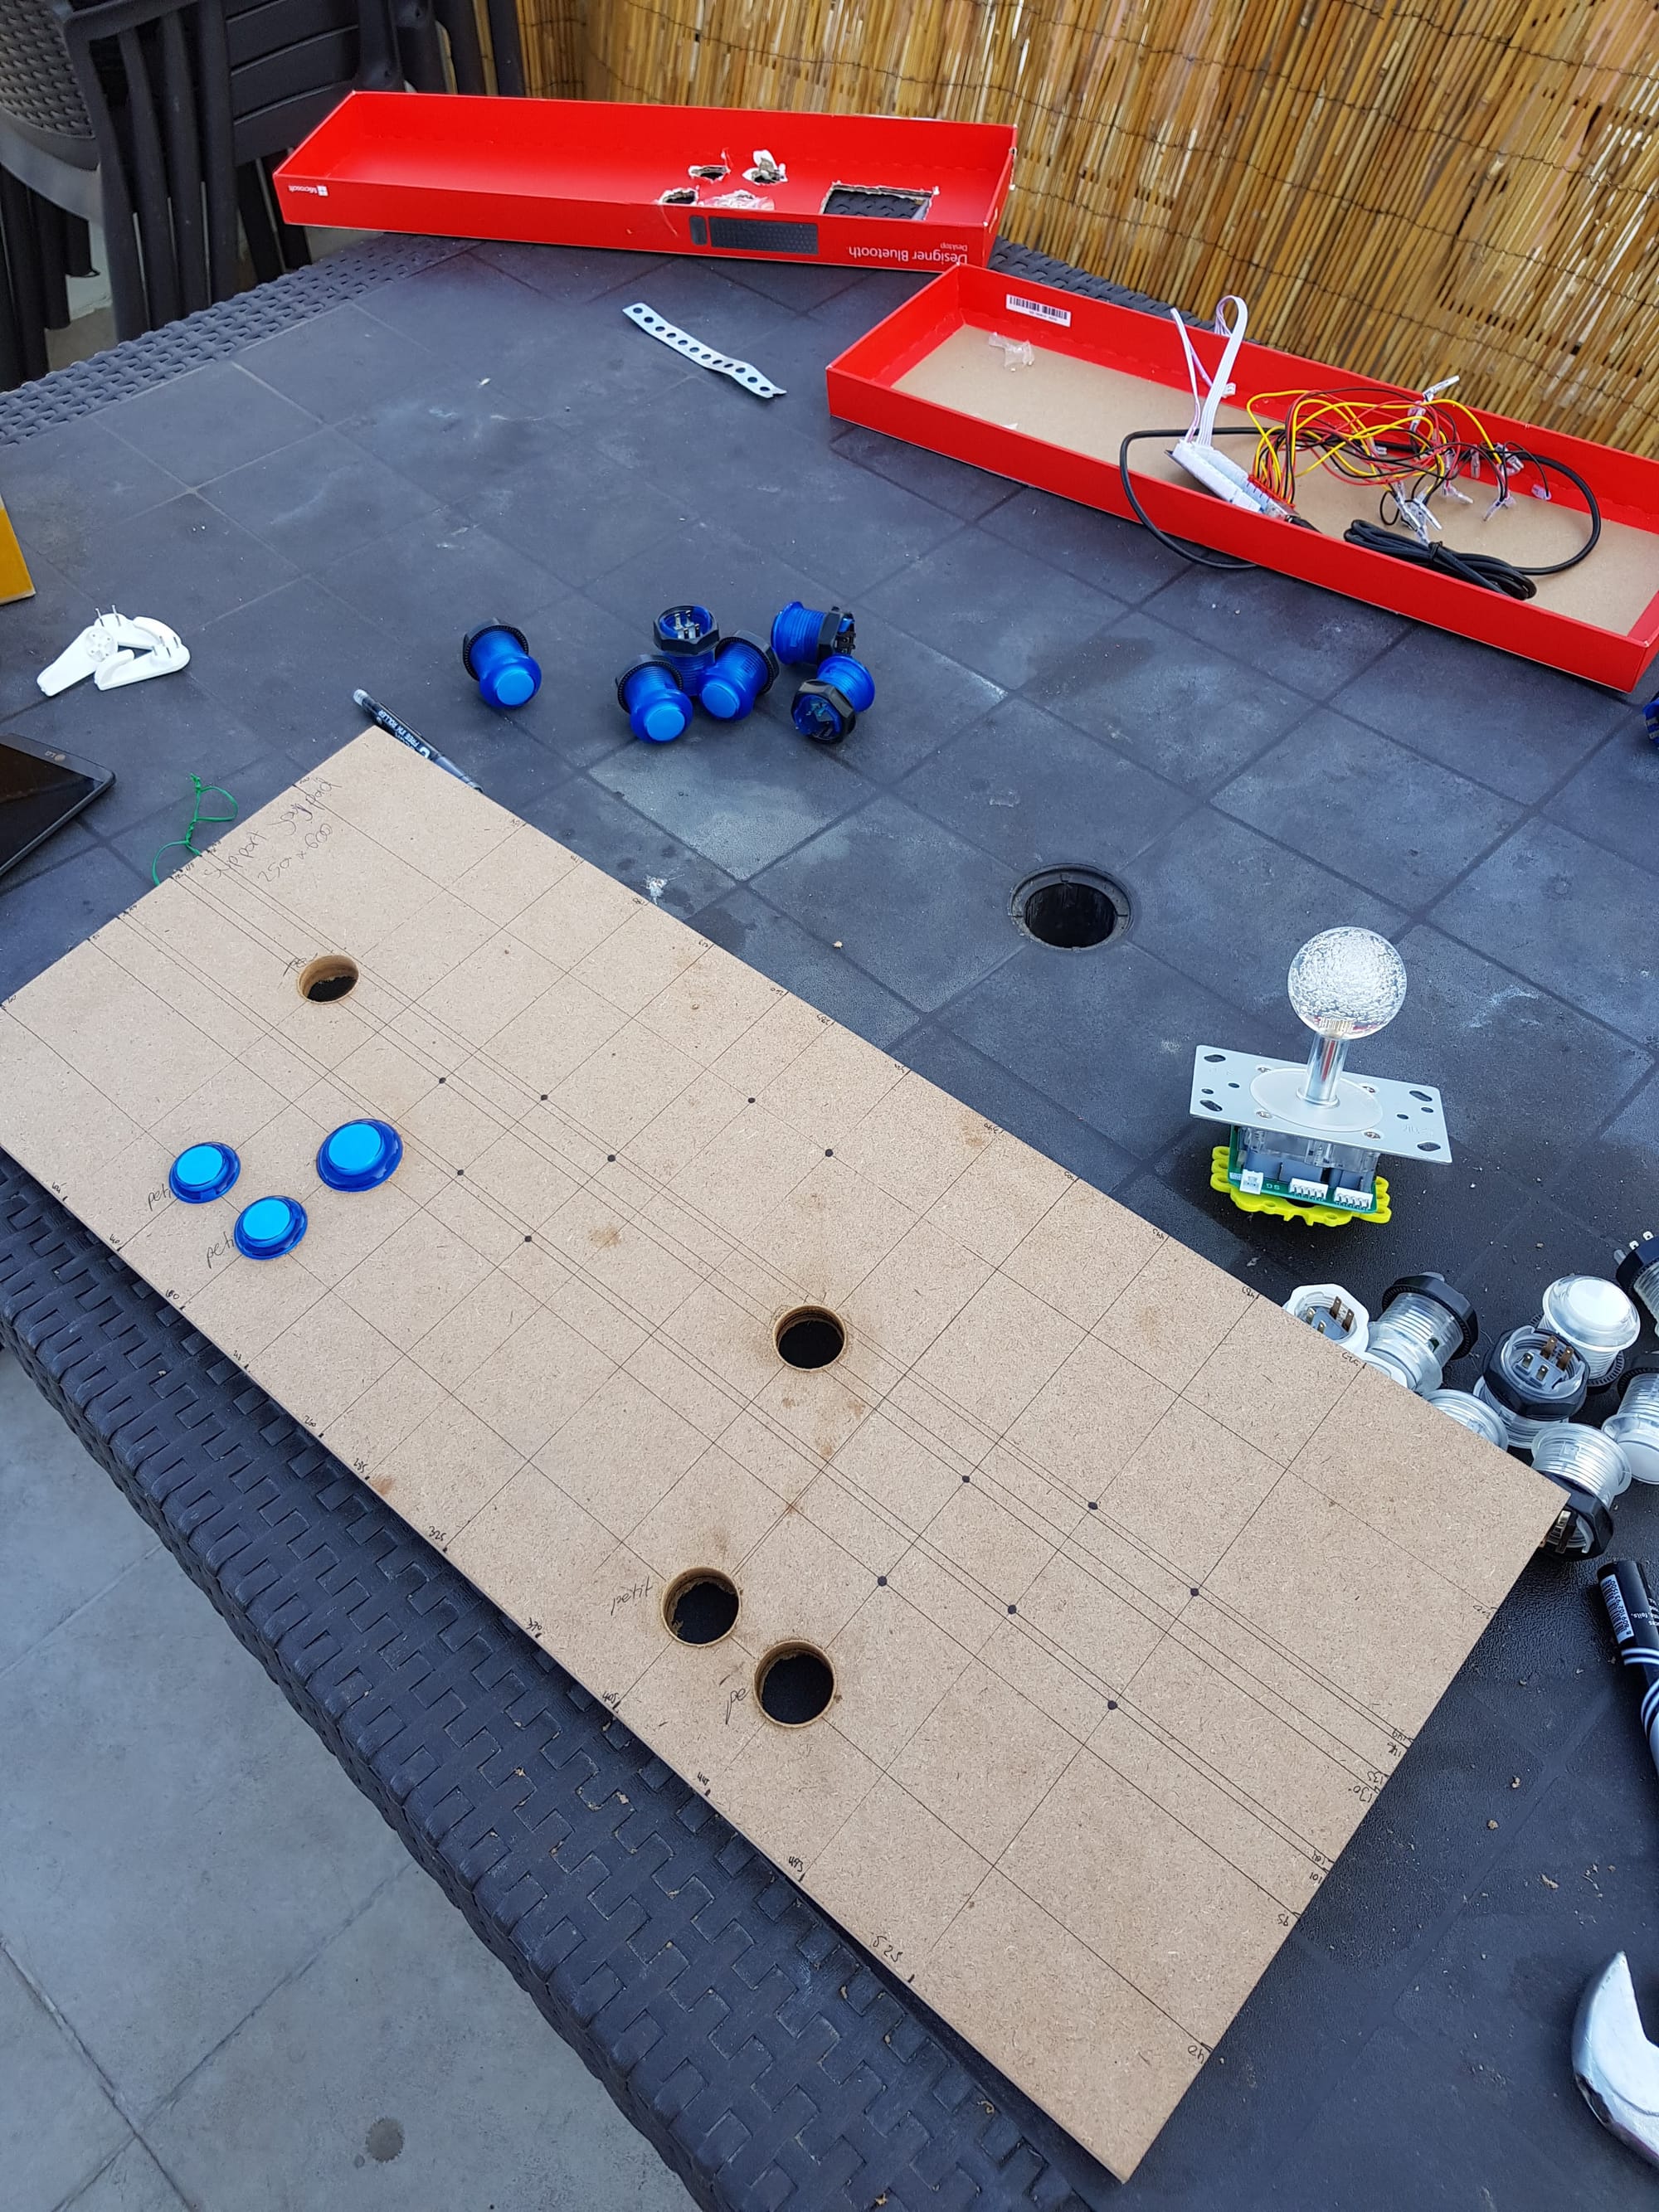
Step 3: Control Panel & Buttons
This was the most fun (and nerve-wracking) part. We laid out button spacing with pencil and ruler, then drilled the 1 1/8" holes.
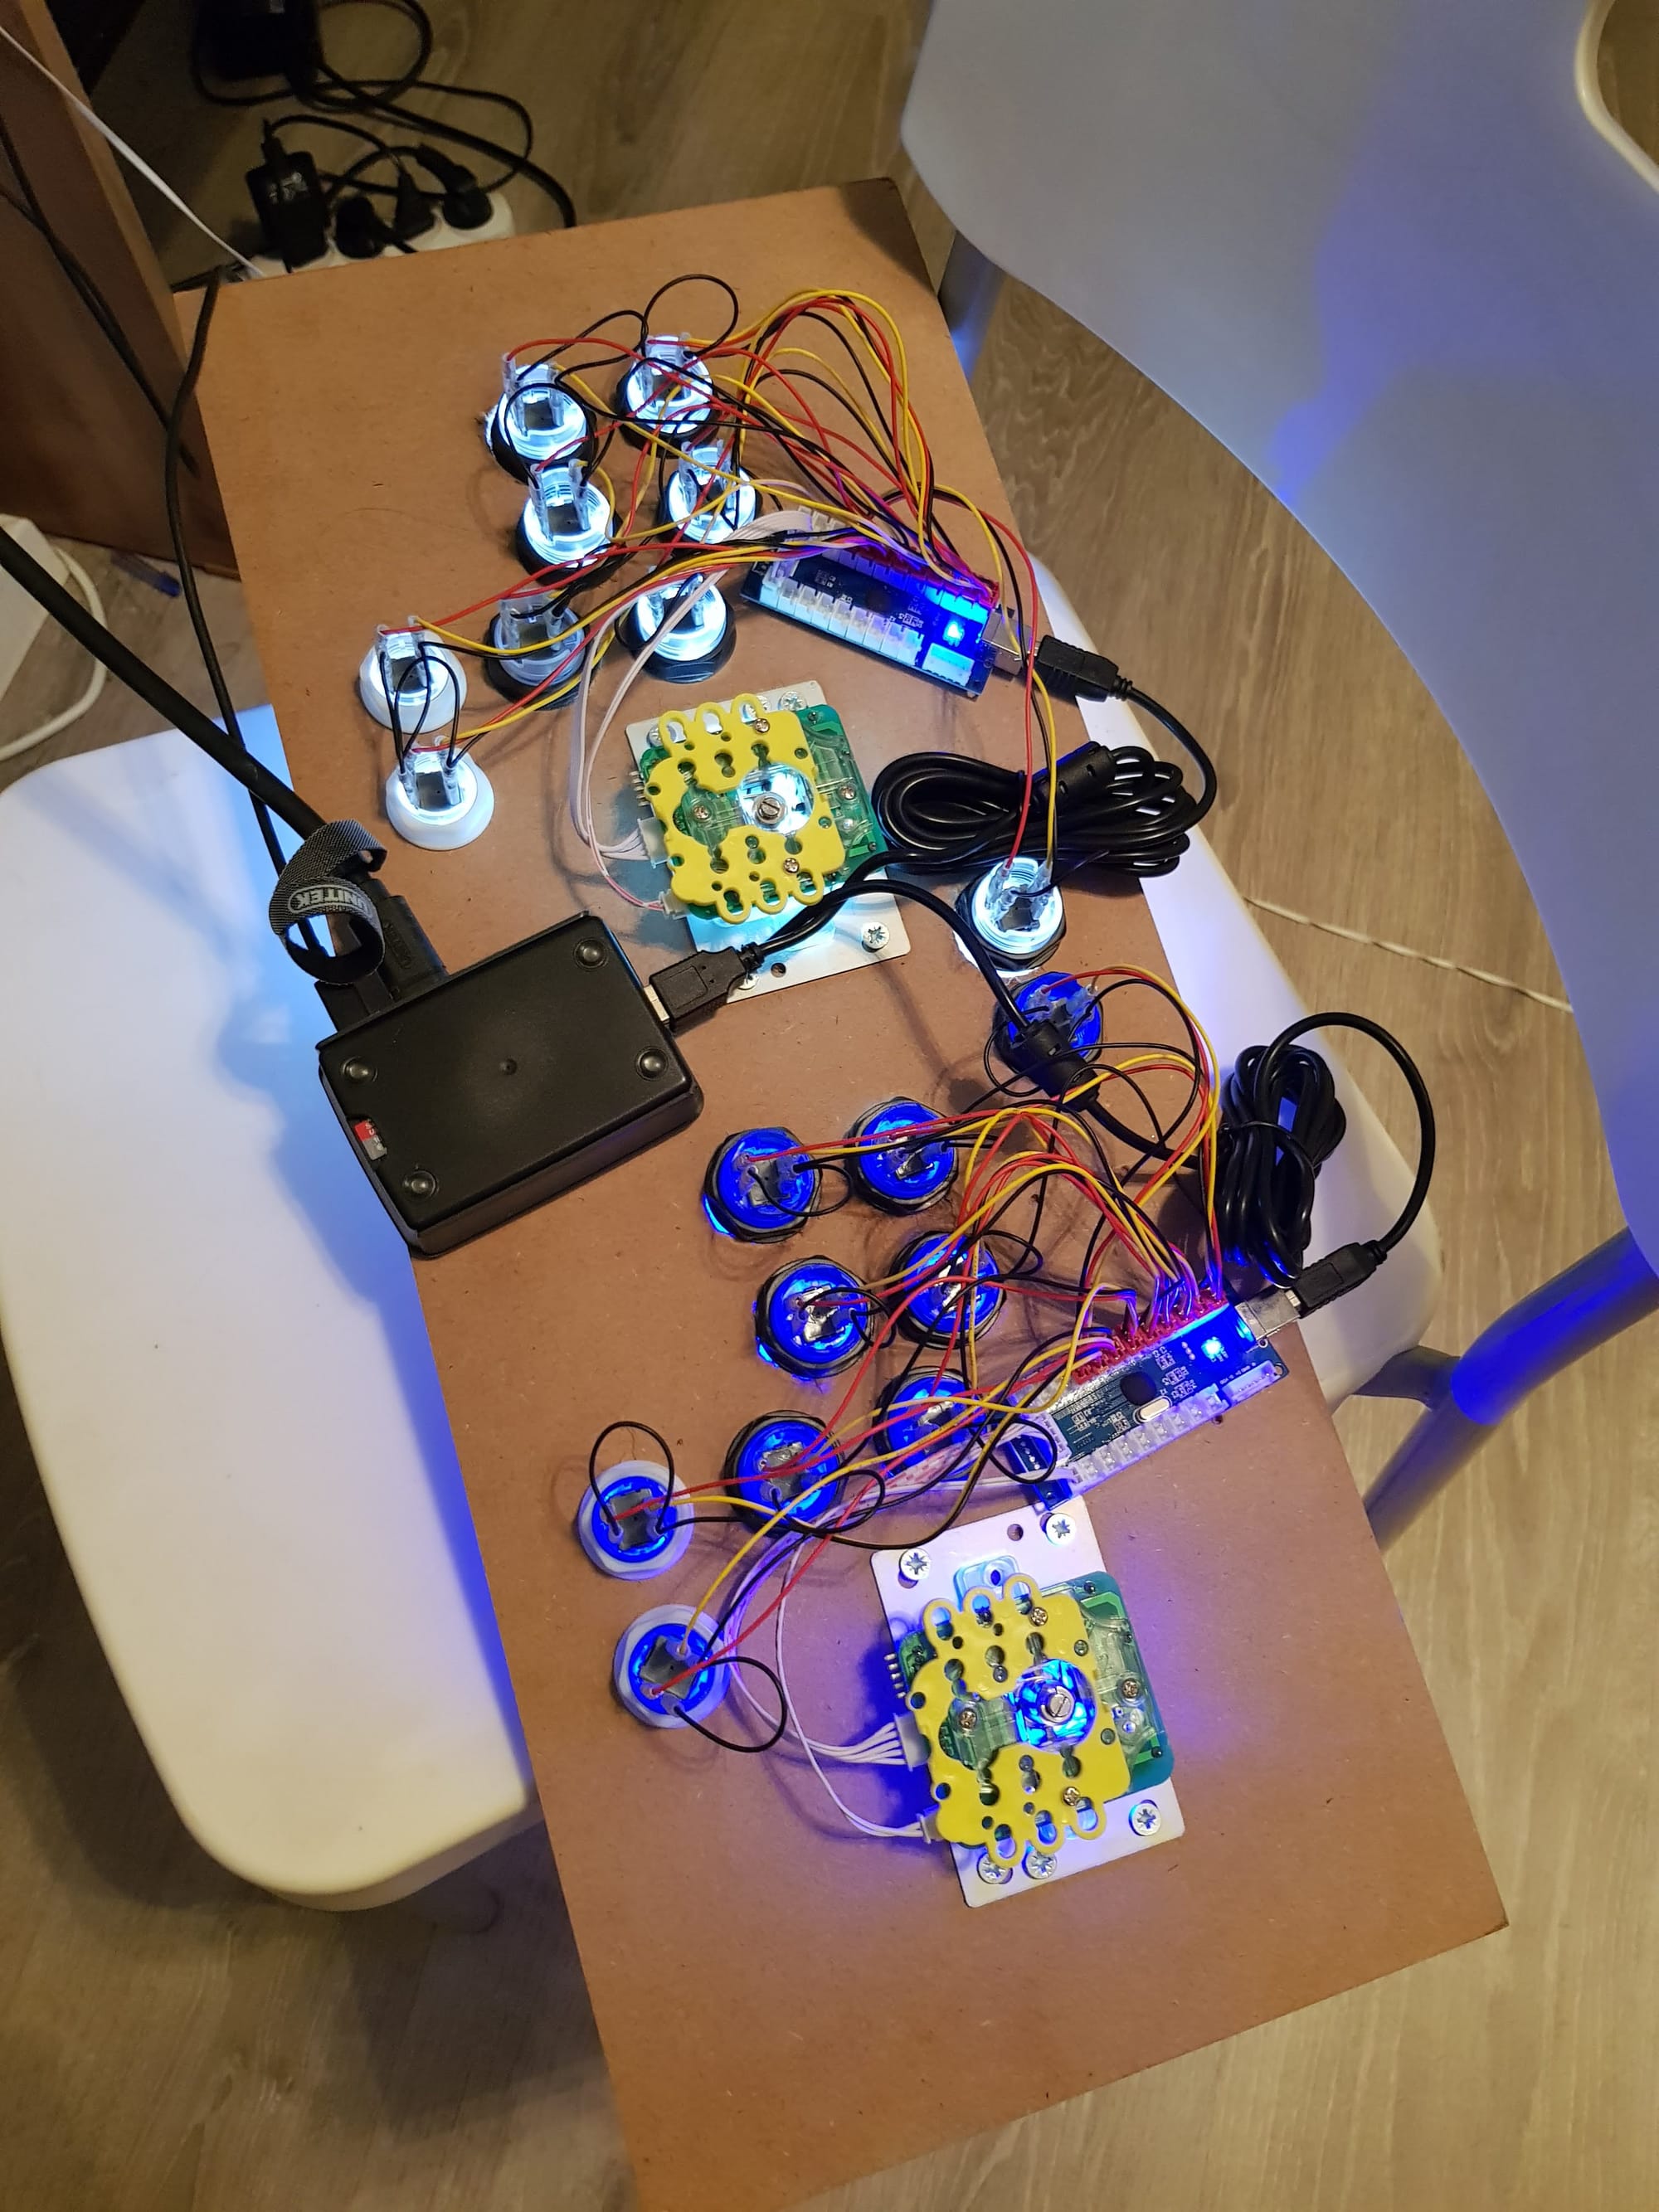
We then wired all buttons and joysticks to the USB encoder. It looked like a spaghetti monster of wires, but once plugged into the Pi, everything worked beautifully.
Step 4: Speakers & Marquee
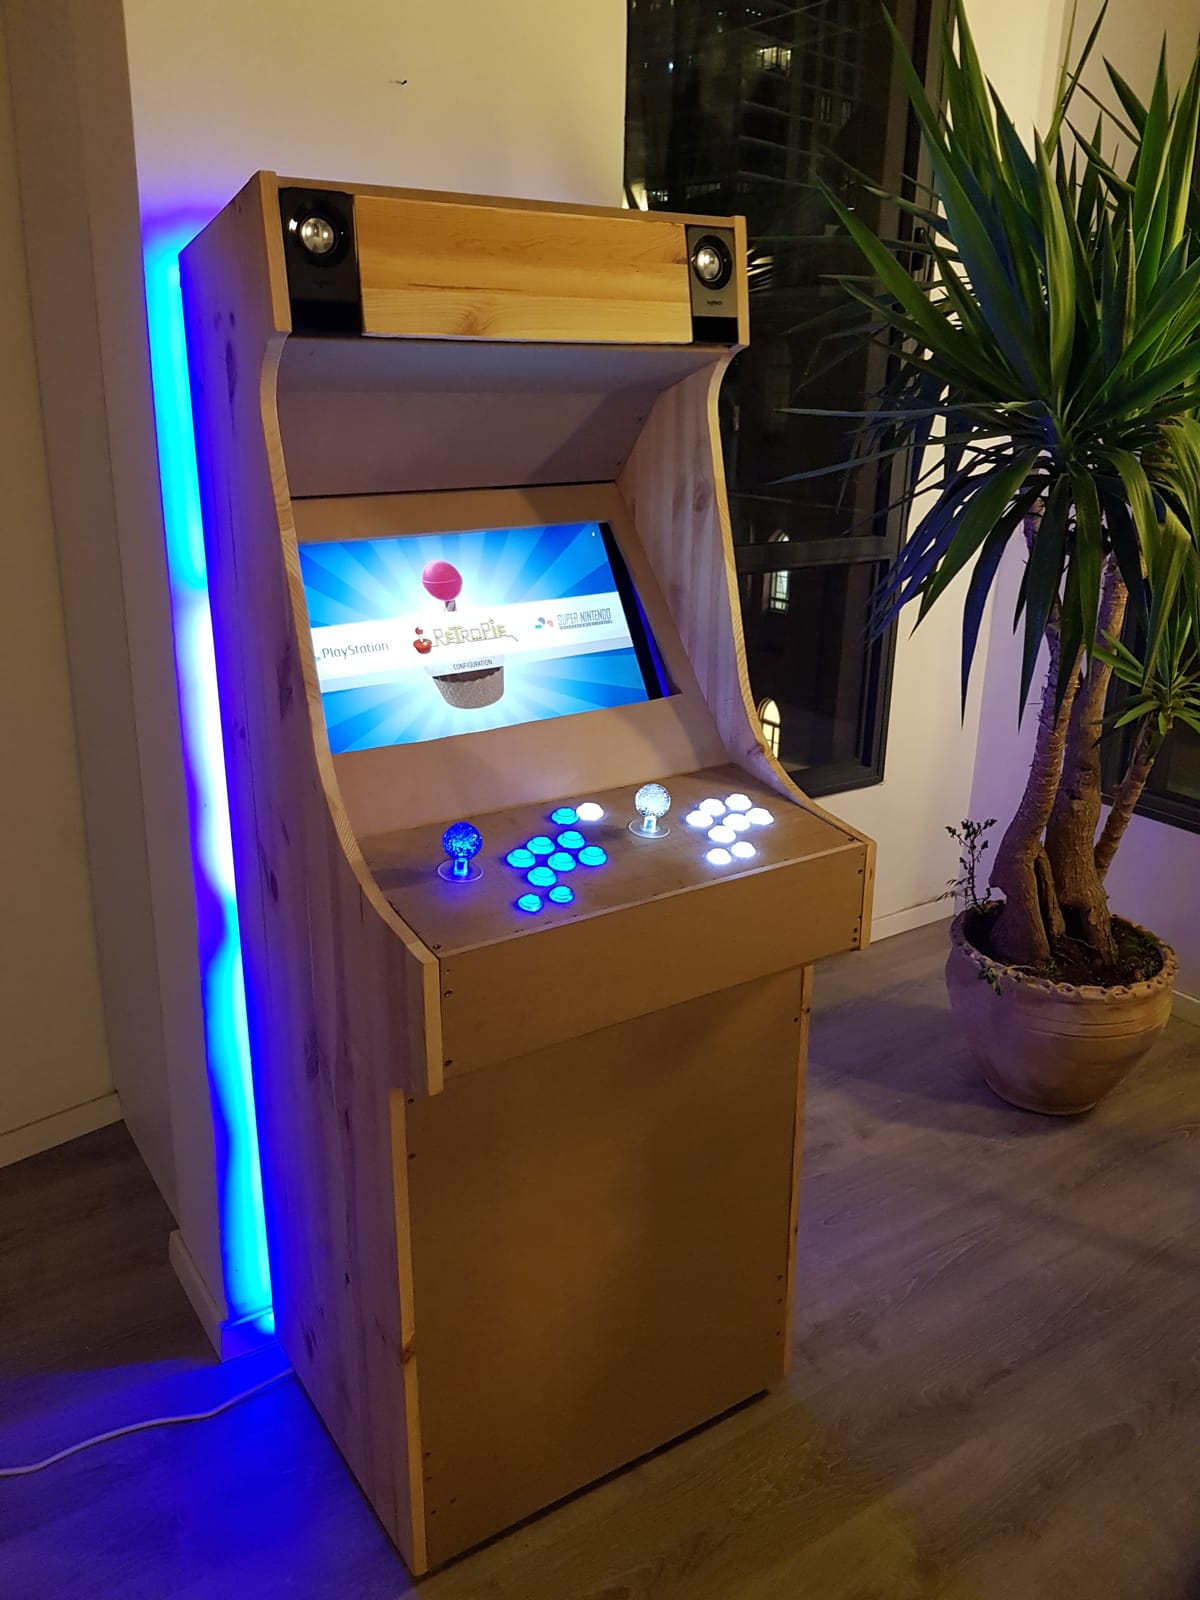
We mounted small desktop speakers into the marquee top for authentic arcade sound. Behind the marquee, a strip of LED lighting could be added for extra flair (future upgrade).
Step 5: Finishing Touches
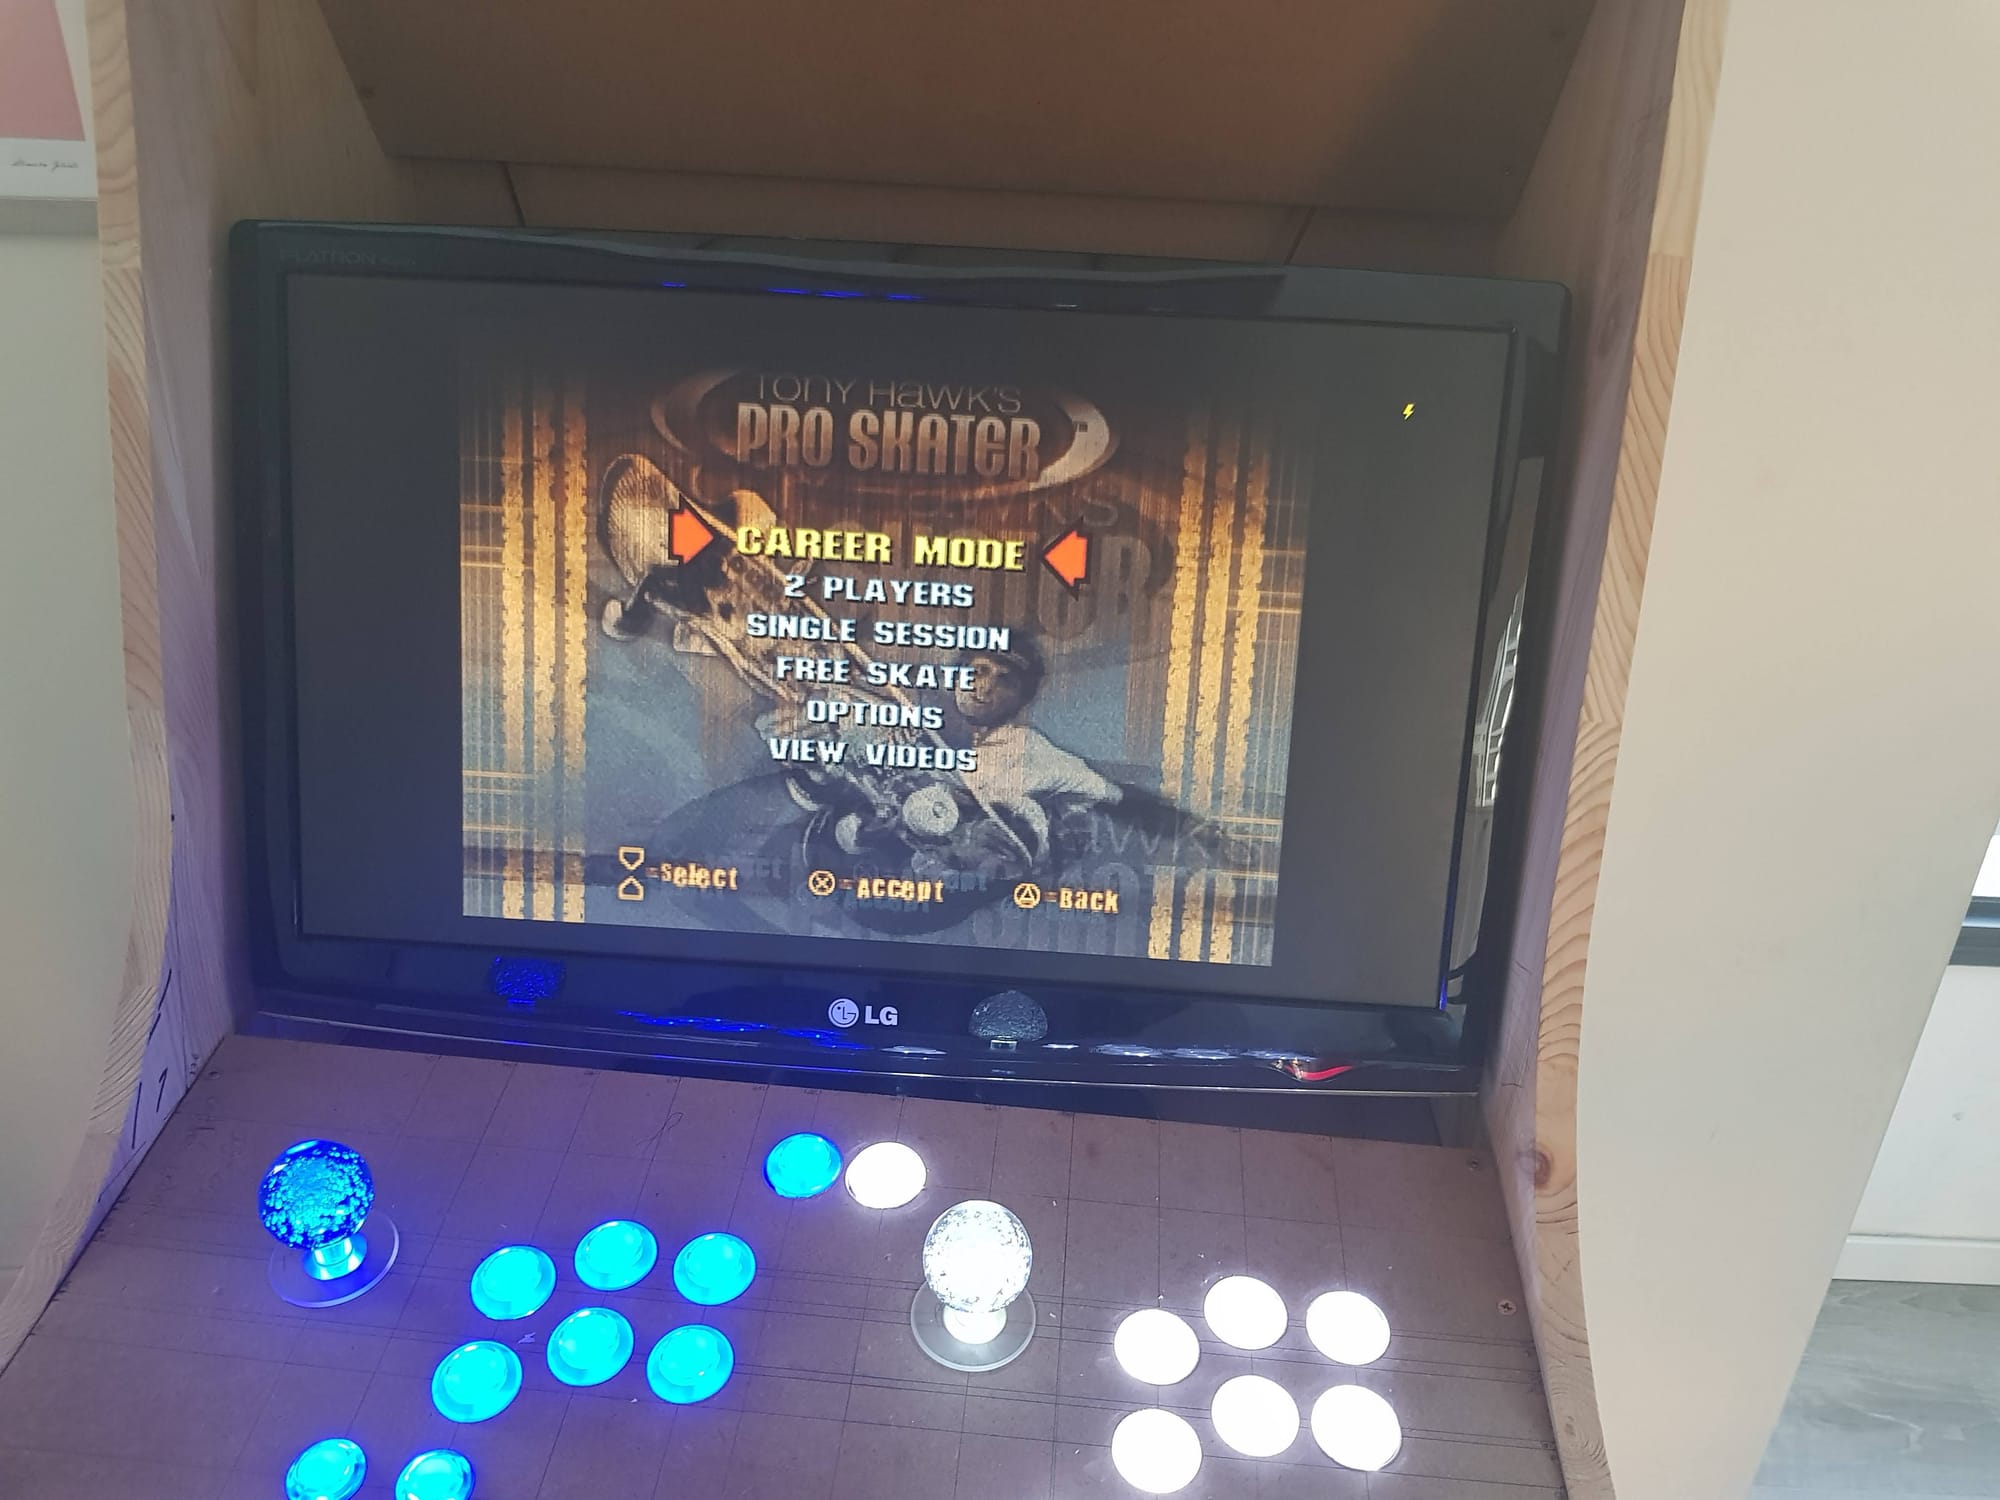
We slotted in the monitor, added Plexiglass for protection, and tidied cables inside.
Paint, vinyl artwork, and T-molding are common final touches, but we loved the raw wood aesthetic.
Step 6: Software Setup
With hardware ready, it was time to flash RetroPie onto the Raspberry Pi. RetroPie lets you emulate consoles and arcade systems, organize ROMs, and customize controls.
We mapped the buttons to player 1 & 2, added classic ROMs, and booted it up.
The first game? Tony Hawk Pro Skater 2 of course.
Lessons Learned
- precision is key with control panel spacing.
- Cable management saves headaches later.
- good quality makes a big difference in feel.
- RetroPie ran flawlessly, even with demanding emulators.
Conclusion
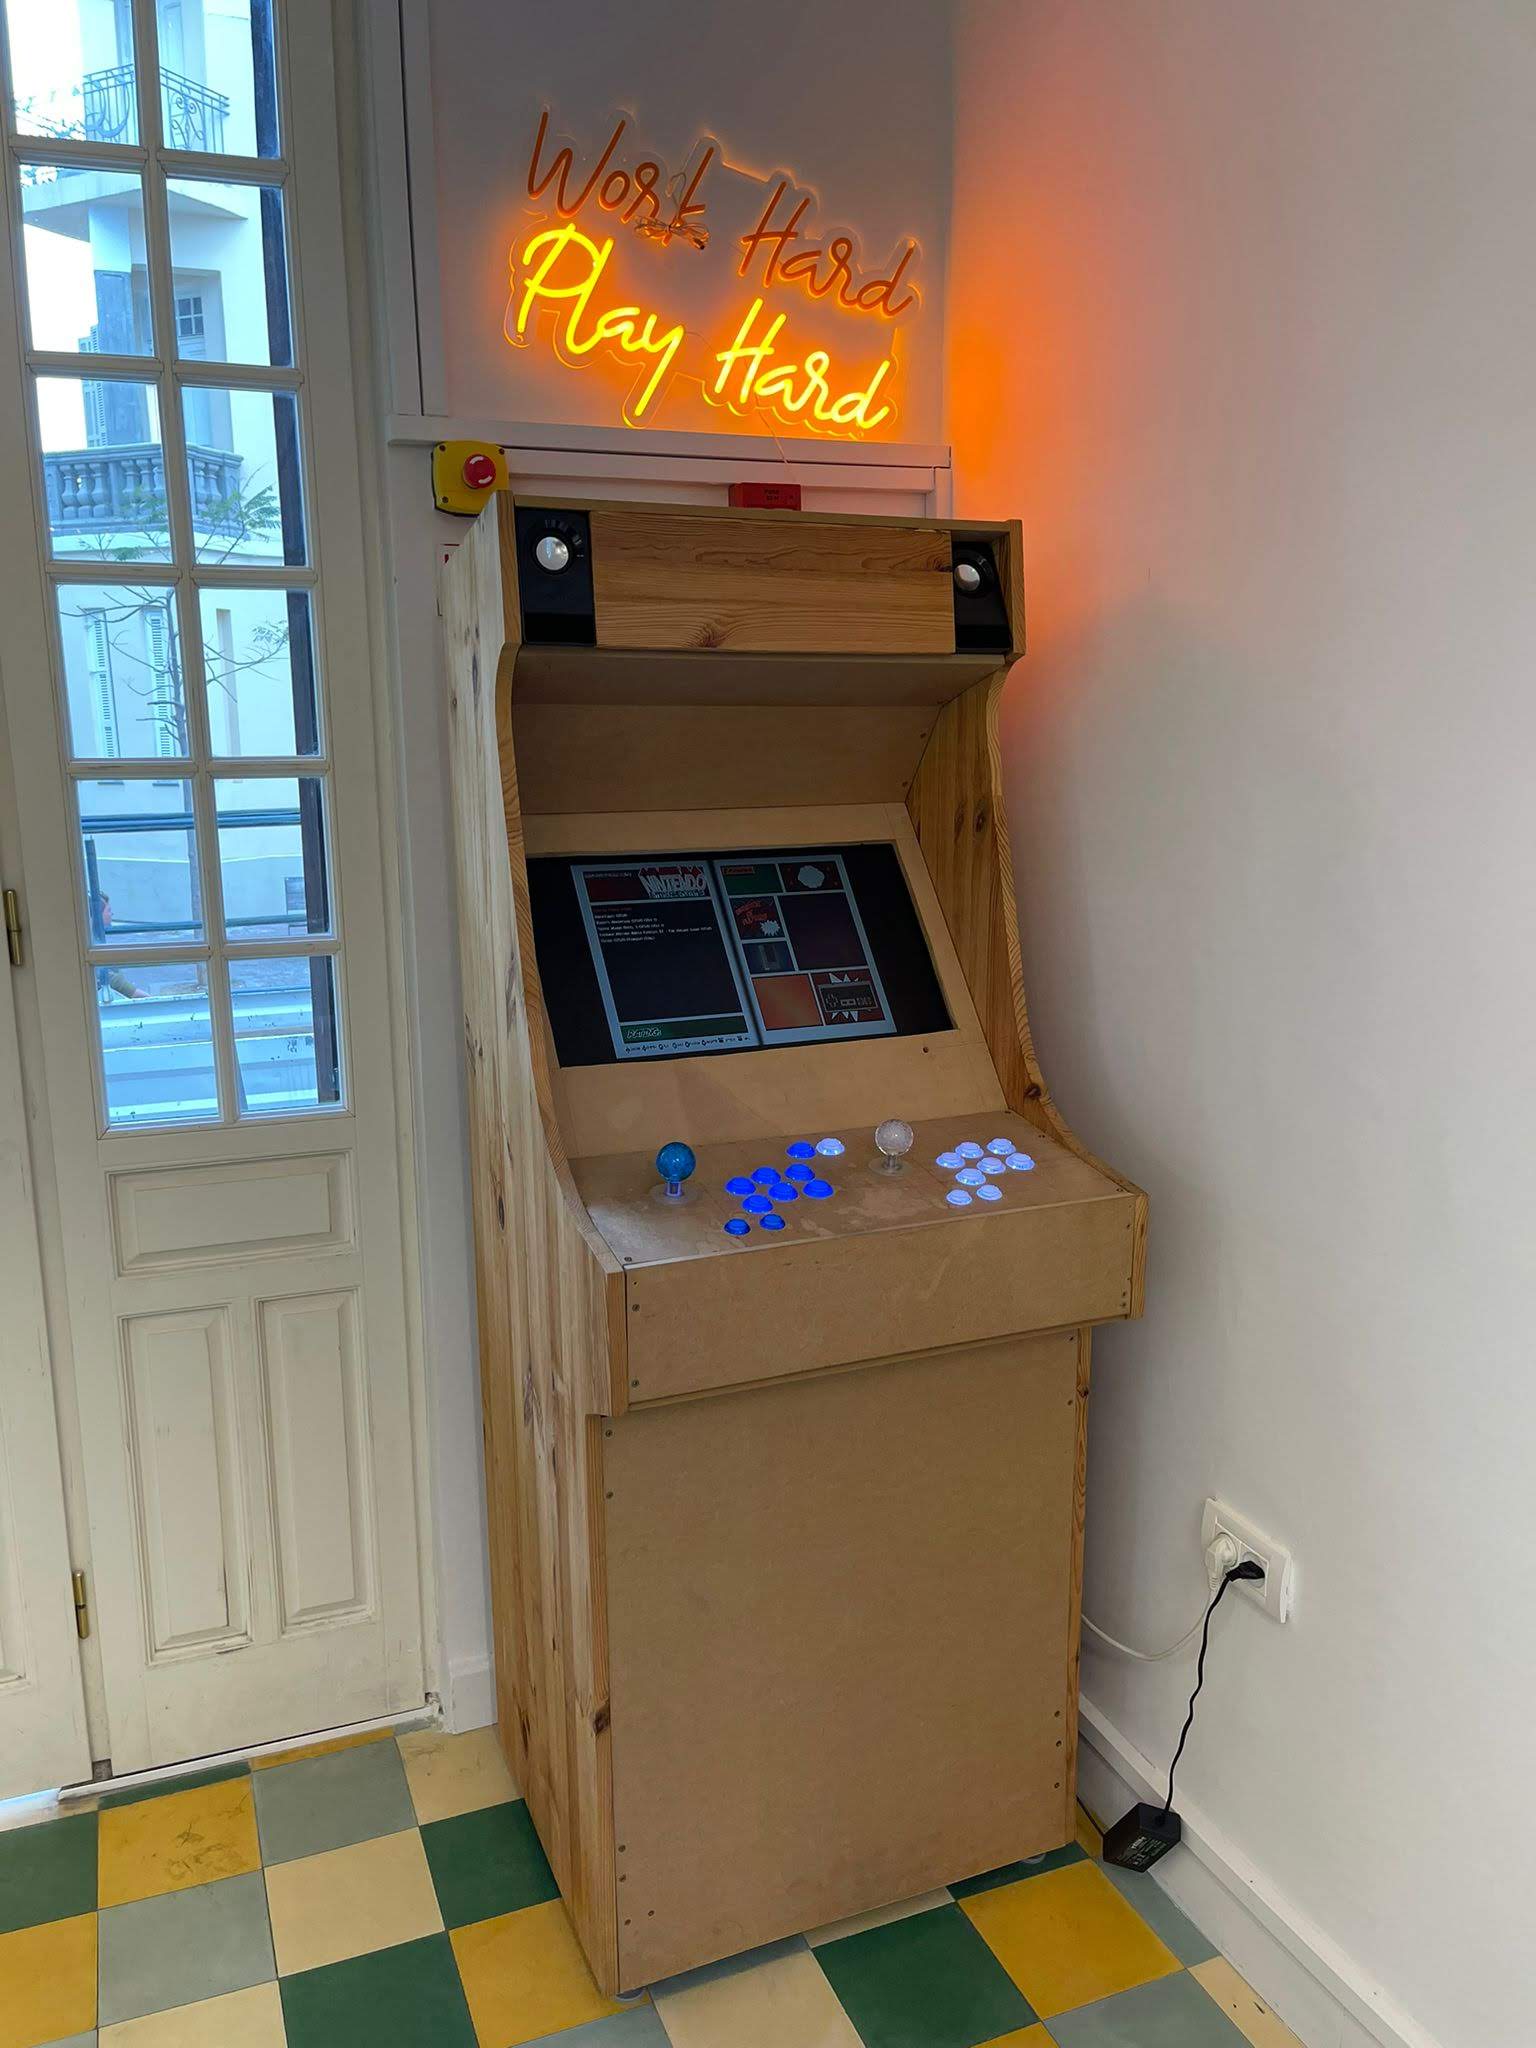
What started as wood planks and a pile of wires turned into a fully functional arcade machine. Now it sits proudly at Meron Capital’s Tel Aviv office, a nostalgic centerpiece and a fun break-time machine.
If you’re tempted, we highly recommend diving in. You’ll learn woodworking, electronics, and retro gaming, and at the end, you’ll own an arcade cabinet that no store-bought version can beat.