Piano LED visualizer
There’s something magical about combining music and lights.
There’s something magical about combining music and lights. Inspired by concert setups and projects I stumbled upon online, I decided to bring that magic home by turning my digital piano into an interactive light show. Using a Raspberry Pi, a WS2812B LED strip, and the fantastic Piano LED Visualizer project, I built a system that reacts to my playing in real time — and can even guide me while learning songs.
What it does
- Lights above each key respond instantly when I play.
- With Synthesia integration, LEDs highlight which keys to press next.
- Load a MIDI file, and the lights show the performance step by step.
- Colors, brightness, and effects can all be tuned via a web interface.
- Save and replay my own performances with synced visuals.
The hardware I used
Here’s everything I needed to build the setup:
Core components
- Digital piano with USB or MIDI output (I have a KAWAI ES6)
- MIDI-to-USB interface (if piano doesn’t have native USB; I used iConnectivity mio for ˜USD 30)
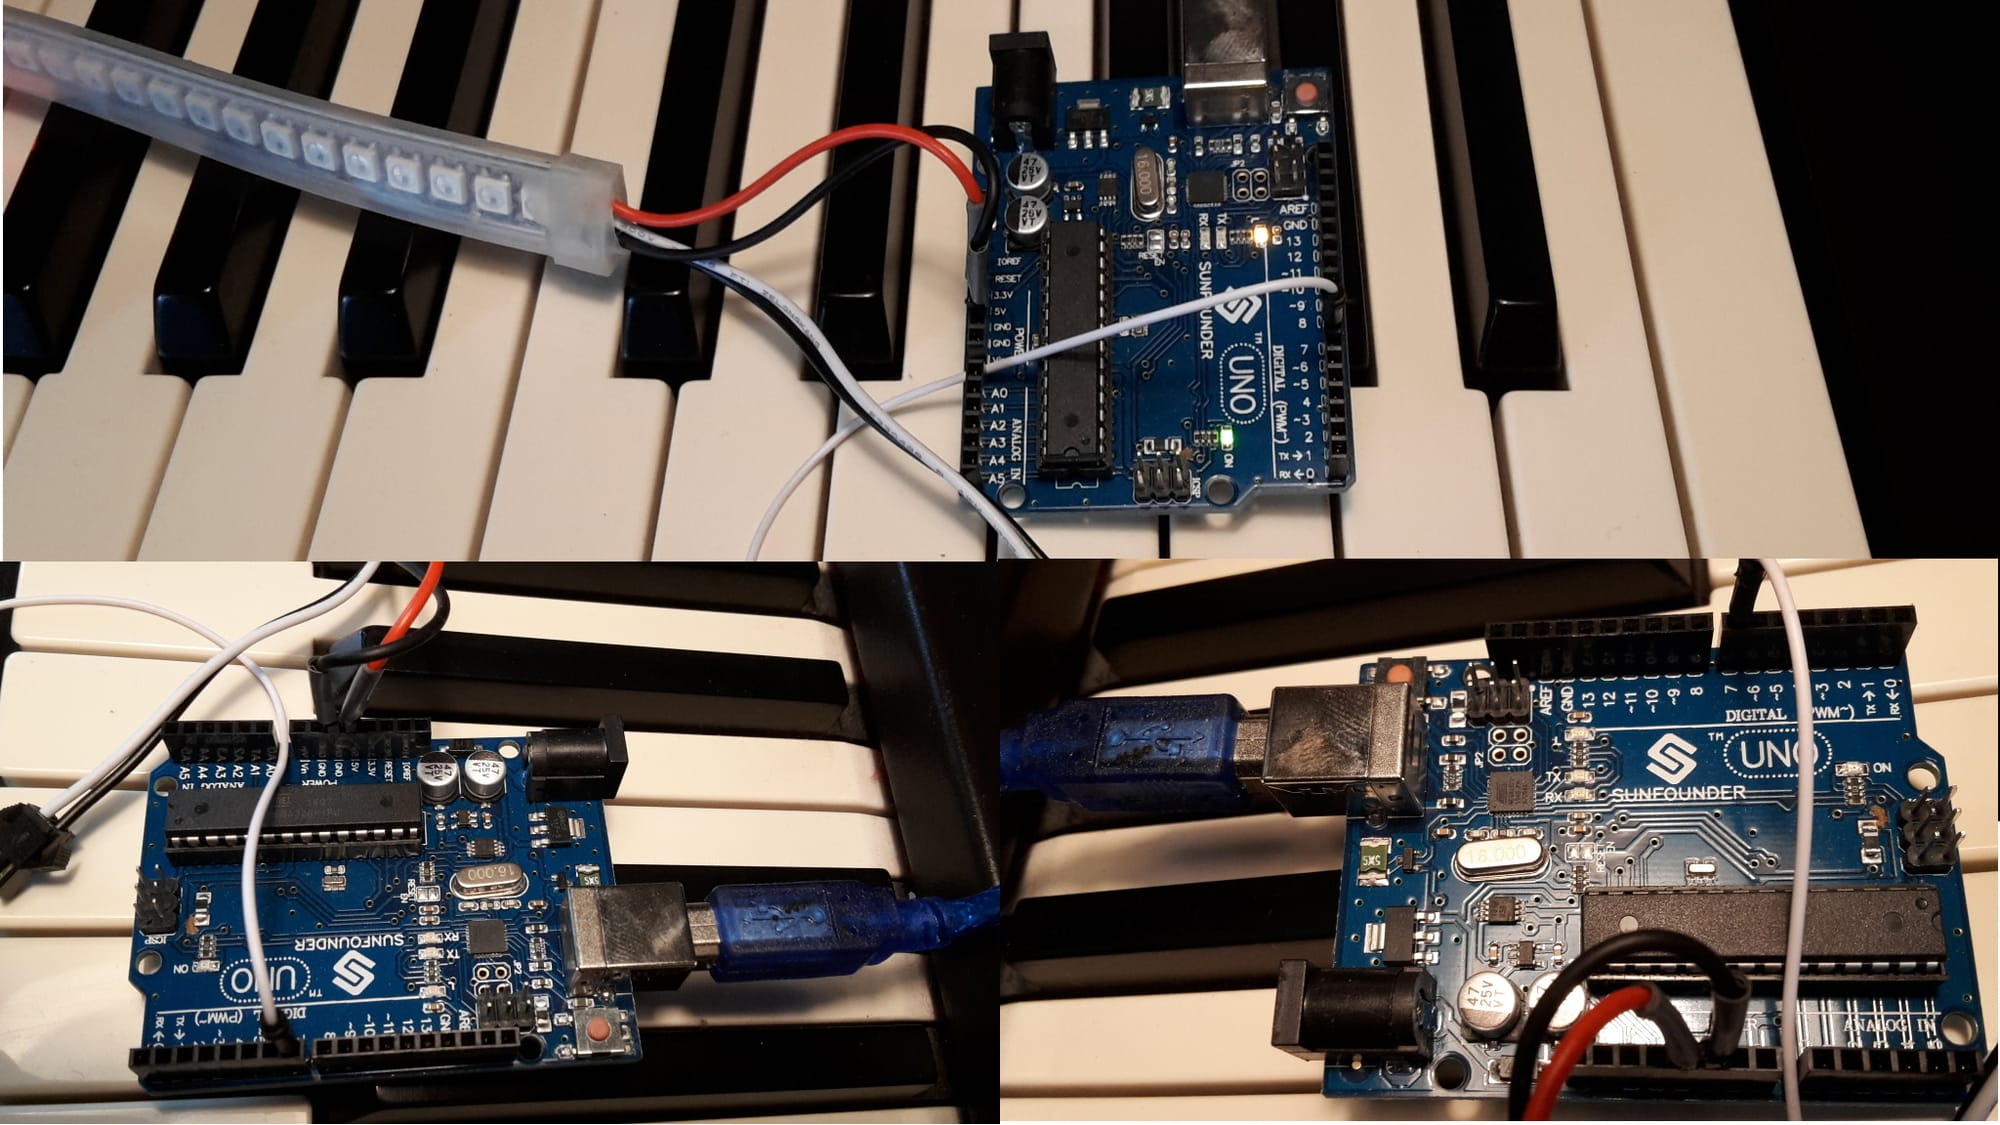
- Raspberry Pi Zero WH + SD Card (Wi-Fi + headers pre-soldered)
- USB OTG hub (at least 2 ports: one for piano, one for computer/tablet)
- WS2812B LED strip (1.5–2m, 144 LEDs/m for precision above keys)
- 5V 6A power supply (enough for ~172 LEDs at 50% brightness)
- Female DC 5.5x2.5mm socket with quick connect
- Wires (22–18 AWG, 1m or more depending on piano layout)
Optional but nice-to-have
- 3D-printed custom case for Raspberry Pi + power socket
- Nylon standoffs & M2.5 screws (for neat mounting)
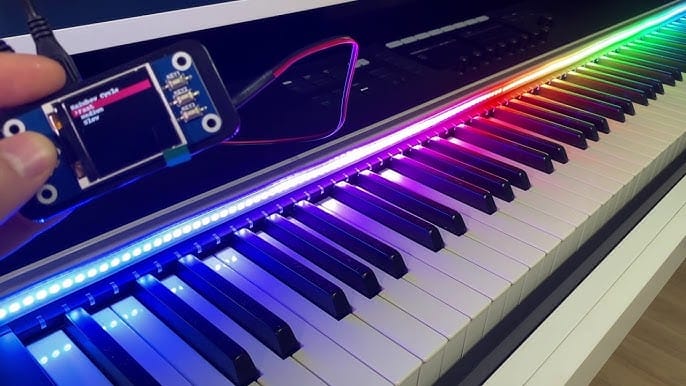
- Waveshare 1.44" TFT LCD (128x128px) for standalone control
- Braided cable sleeves + heat-shrink bands for tidy wiring
- Aluminum LED profile with diffuser for a clean piano look
- Double-sided tape for mounting the strip
- Laptop or tablet running Synthesia (optional learning integration)
💡 Total cost (excluding piano/tablet): ~75–100 USD
Setting up the software
There are two main approaches:
- Prebuilt image (easiest)
- Download the preconfigured Piano LED Visualizer image.
- Flash it to the SD card using Balena Etcher or Win32 Disk Imager.
- Boot the Pi; after a few minutes, it creates a Wi-Fi hotspot (
PianoLEDVisualizer, passwordvisualizer). - Connect and access the web interface at
http://pianoledvisualizer.local. - Configure LED strip pins, MIDI input, and web interface port if needed.
Wiring the LEDs
Most WS2812B strips are wired GND → Data → VCC (5V). Double-check before connecting.
- Ground from LED strip → Raspberry Pi GND
- Data from LED strip → GPIO pin (default: GPIO18)
- VCC (5V) from LED strip → external power supply (⚠️ not Pi’s 5V pin if >10 LEDs)
- Connect Pi GND to power supply GND (common ground).
For a polished setup, I placed the LED strip inside an aluminum profile with diffuser and mounted it above the keys.
Using it
- Open the web interface to customize colors, effects, and brightness.
- Play piano → lights react in real time.
- Load MIDI files → visualizer shows which keys to press.
- Enable Synthesia integration → lights guide learning sessions.
Optional hat extension adds physical buttons and a screen for standalone control.
Lessons learned
- 172 LEDs at full brightness can pull >5A; always size your power supply correctly.
- bare LED strips are harsh; aluminum profile + diffuser creates a professional stage-like glow.
- Pi Zero WH worked best; larger Pi models sometimes added input lag.
- This setup isn’t just flashy — it’s a genuine tool for practicing and teaching.
Closing thoughts
Turning my digital piano into a light show was one of the most fun Raspberry Pi projects I’ve built. It combines hardware, music, and coding into a system that’s not only visually stunning but genuinely useful for learning.
Whether you’re performing, teaching, or just enjoying the visuals while practicing, the Piano LED Visualizer makes your instrument come alive.